Android adb를 활용한 테스트
Android adb 란?
adb 는 android debug bridge 의 약자로 에뮬레이터 인스턴스나 연결된 android 장비와 통신할 수 있는 다목적 명령줄 도구로 자세한 사용 방법은 user guide 에서 확인할 수 있습니다.
설치
adb 가 포함된 android-platform-tools 와
android-sdk 를 설치 합니다.
Homebrew 가 설치되어 있어야 합니다.
- 테스트 환경
- MacOS Mojave version 10.14.2
- Samsung Galaxy s6 (android version 7)
- java 8.0.192-zulu
android-platform-tools 설치
$ brew cask install android-platform-tools

Updating Homebrew...
==> Satisfying dependencies
==> Downloading https://dl.google.com/android/repository/platform-tools_r28.0.1-darwin.zip
######################################################################## 100.0%
==> Verifying SHA-256 checksum for Cask 'android-platform-tools'.
==> Installing Cask android-platform-tools
==> Linking Binary 'adb' to '/usr/local/bin/adb'.
==> Linking Binary 'dmtracedump' to '/usr/local/bin/dmtracedump'.
==> Linking Binary 'etc1tool' to '/usr/local/bin/etc1tool'.
==> Linking Binary 'fastboot' to '/usr/local/bin/fastboot'.
==> Linking Binary 'hprof-conv' to '/usr/local/bin/hprof-conv'.
==> Linking Binary 'mke2fs' to '/usr/local/bin/mke2fs'.
🍺  android-platform-tools was successfully installed!

# adb 버전 확인
$ adb version

Android Debug Bridge version 1.0.40
Version 4986621
Installed as /usr/local/bin/adb
android-sdk 설치
$ brew tap homebrew/cask

$ brew cask install android-sdk

Updating Homebrew...
==> Caveats
You can control android sdk packages via the sdkmanager command.
You may want to add to your profile:

  'export ANDROID_SDK_ROOT="/usr/local/share/android-sdk"'

android-sdk requires Java 8. You can install it with

  brew cask install homebrew/cask-versions/java8

==> Satisfying dependencies
==> Downloading https://dl.google.com/android/repository/sdk-tools-darwin-4333796.zip
Already downloaded: ~/Library/Caches/Homebrew/downloads/b556e94e3ceec88e3a4a87181361c20aae8ca8f45513c021e132c372cafc5258--sdk-tools-darwin-4333796.zip
==> Verifying SHA-256 checksum for Cask 'android-sdk'.
==> Installing Cask android-sdk
==> Linking Binary 'android' to '/usr/local/bin/android'.
==> Linking Binary 'archquery' to '/usr/local/bin/archquery'.
==> Linking Binary 'avdmanager' to '/usr/local/bin/avdmanager'.
==> Linking Binary 'jobb' to '/usr/local/bin/jobb'.
==> Linking Binary 'lint' to '/usr/local/bin/lint'.
==> Linking Binary 'monkeyrunner' to '/usr/local/bin/monkeyrunner'.
==> Linking Binary 'screenshot2' to '/usr/local/bin/screenshot2'.
==> Linking Binary 'sdkmanager' to '/usr/local/bin/sdkmanager'.
==> Linking Binary 'uiautomatorviewer' to '/usr/local/bin/uiautomatorviewer'.
==> Linking Binary 'emulator' to '/usr/local/bin/emulator'.
==> Linking Binary 'emulator-check' to '/usr/local/bin/emulator-check'.
==> Linking Binary 'mksdcard' to '/usr/local/bin/mksdcard'.
==> Linking Binary 'monitor' to '/usr/local/bin/monitor'.
🍺  android-sdk was successfully installed!
설정
환경 설정 파일에 아래 내용 추가합니다.
$ vi ~/.zshrc
---
# 아래 내용 추가

# Path to your android-sdk for pidcat
export ANDROID_SDK_ROOT="/usr/local/share/android-sdk"
export PATH=$PATH:$ANDROID_SDK_ROOT/tools

# path to adb for pidcat
export ANDROID_PLATFORM_TOOLS="/usr/local/Caskroom/android-platform-tools/28.0.1"
export PATH=$PATH:$ANDROID_PLATFORM_TOOLS/platform-tools
---

# 추가한 설정 정보 적용
$ source ~/.zshrc
Android 장비 설정
일반적으로 초기화된 Android 장비는 개발자 옵션이 활성화되지 않은 상태입니다. 따라서, 아래의 순서로 개발자 옵션 설정을 설정해 줍니다.
주의 : Android 장비는 adb 가 설치된 macOS 와 연결되지 않은 상태로 아래 설정을 진행합니다.
개발자 옵션 전환
- Android 장비 > 설정 > 소프트웨어 정보 > 빌드번호 영역을 7번 터치 합니다.
- 개발자 옵션 활성화되면 개발자 옵션 화면으로 진입합니다.
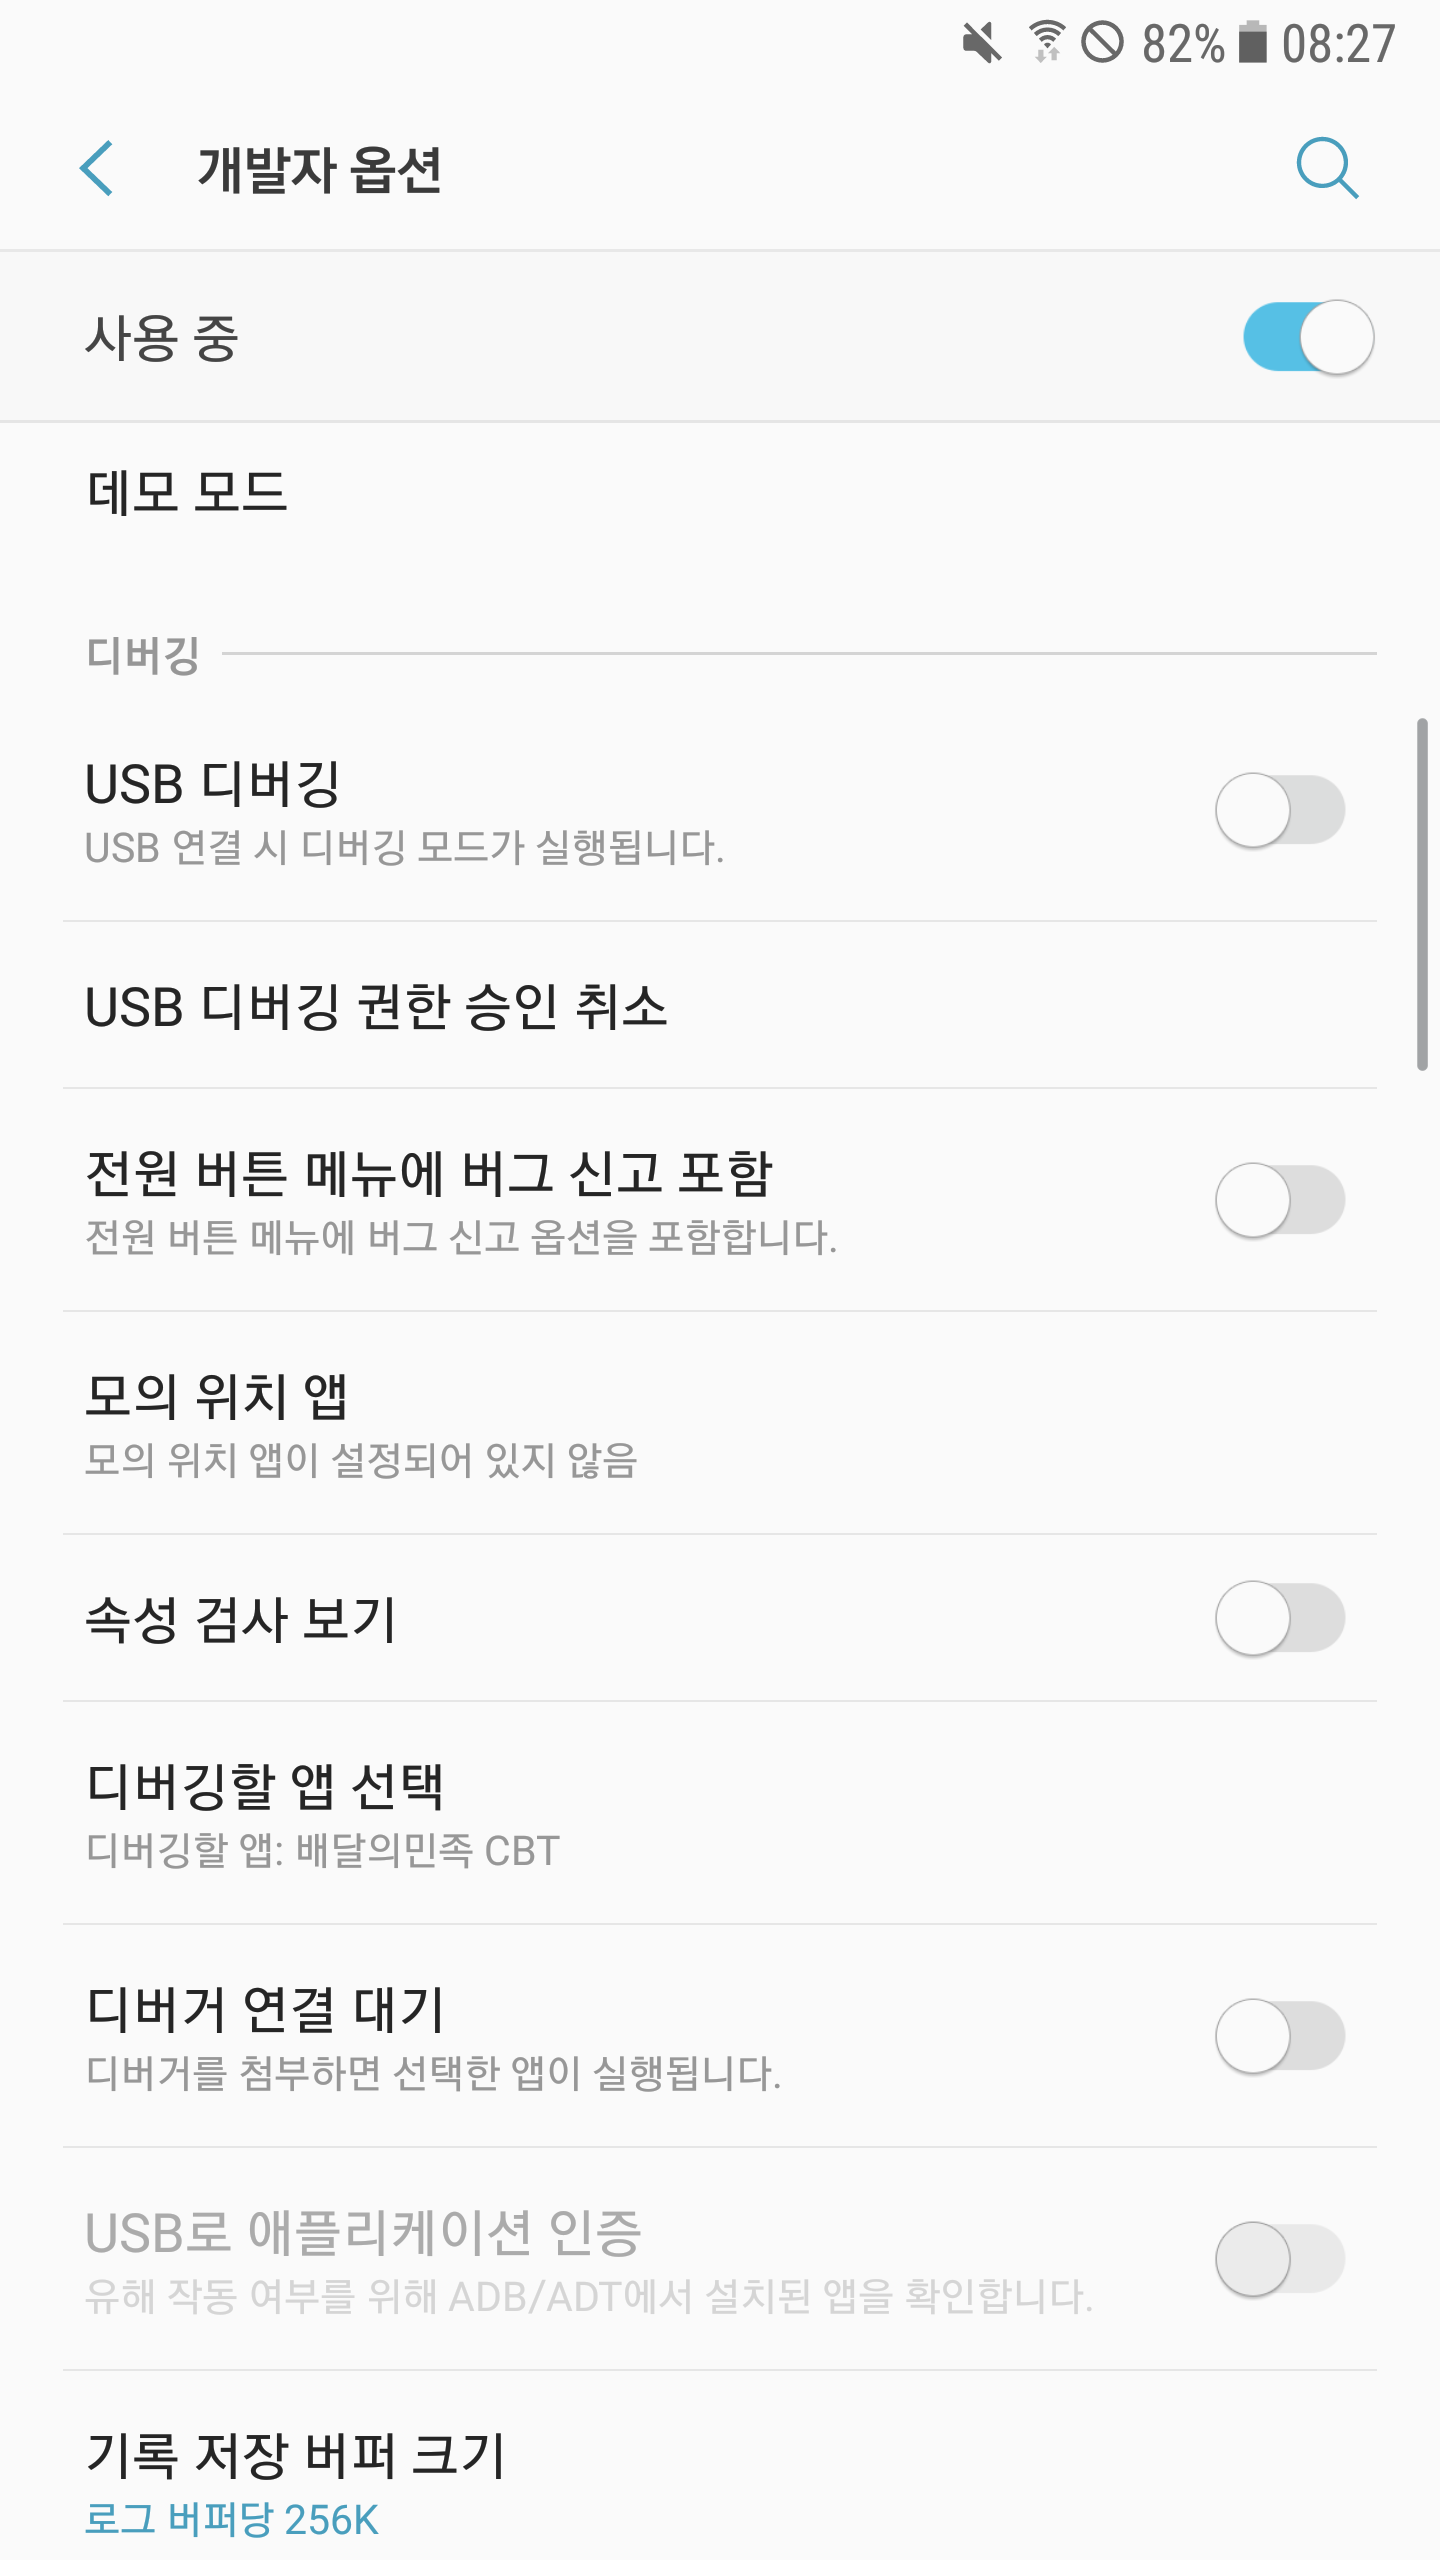
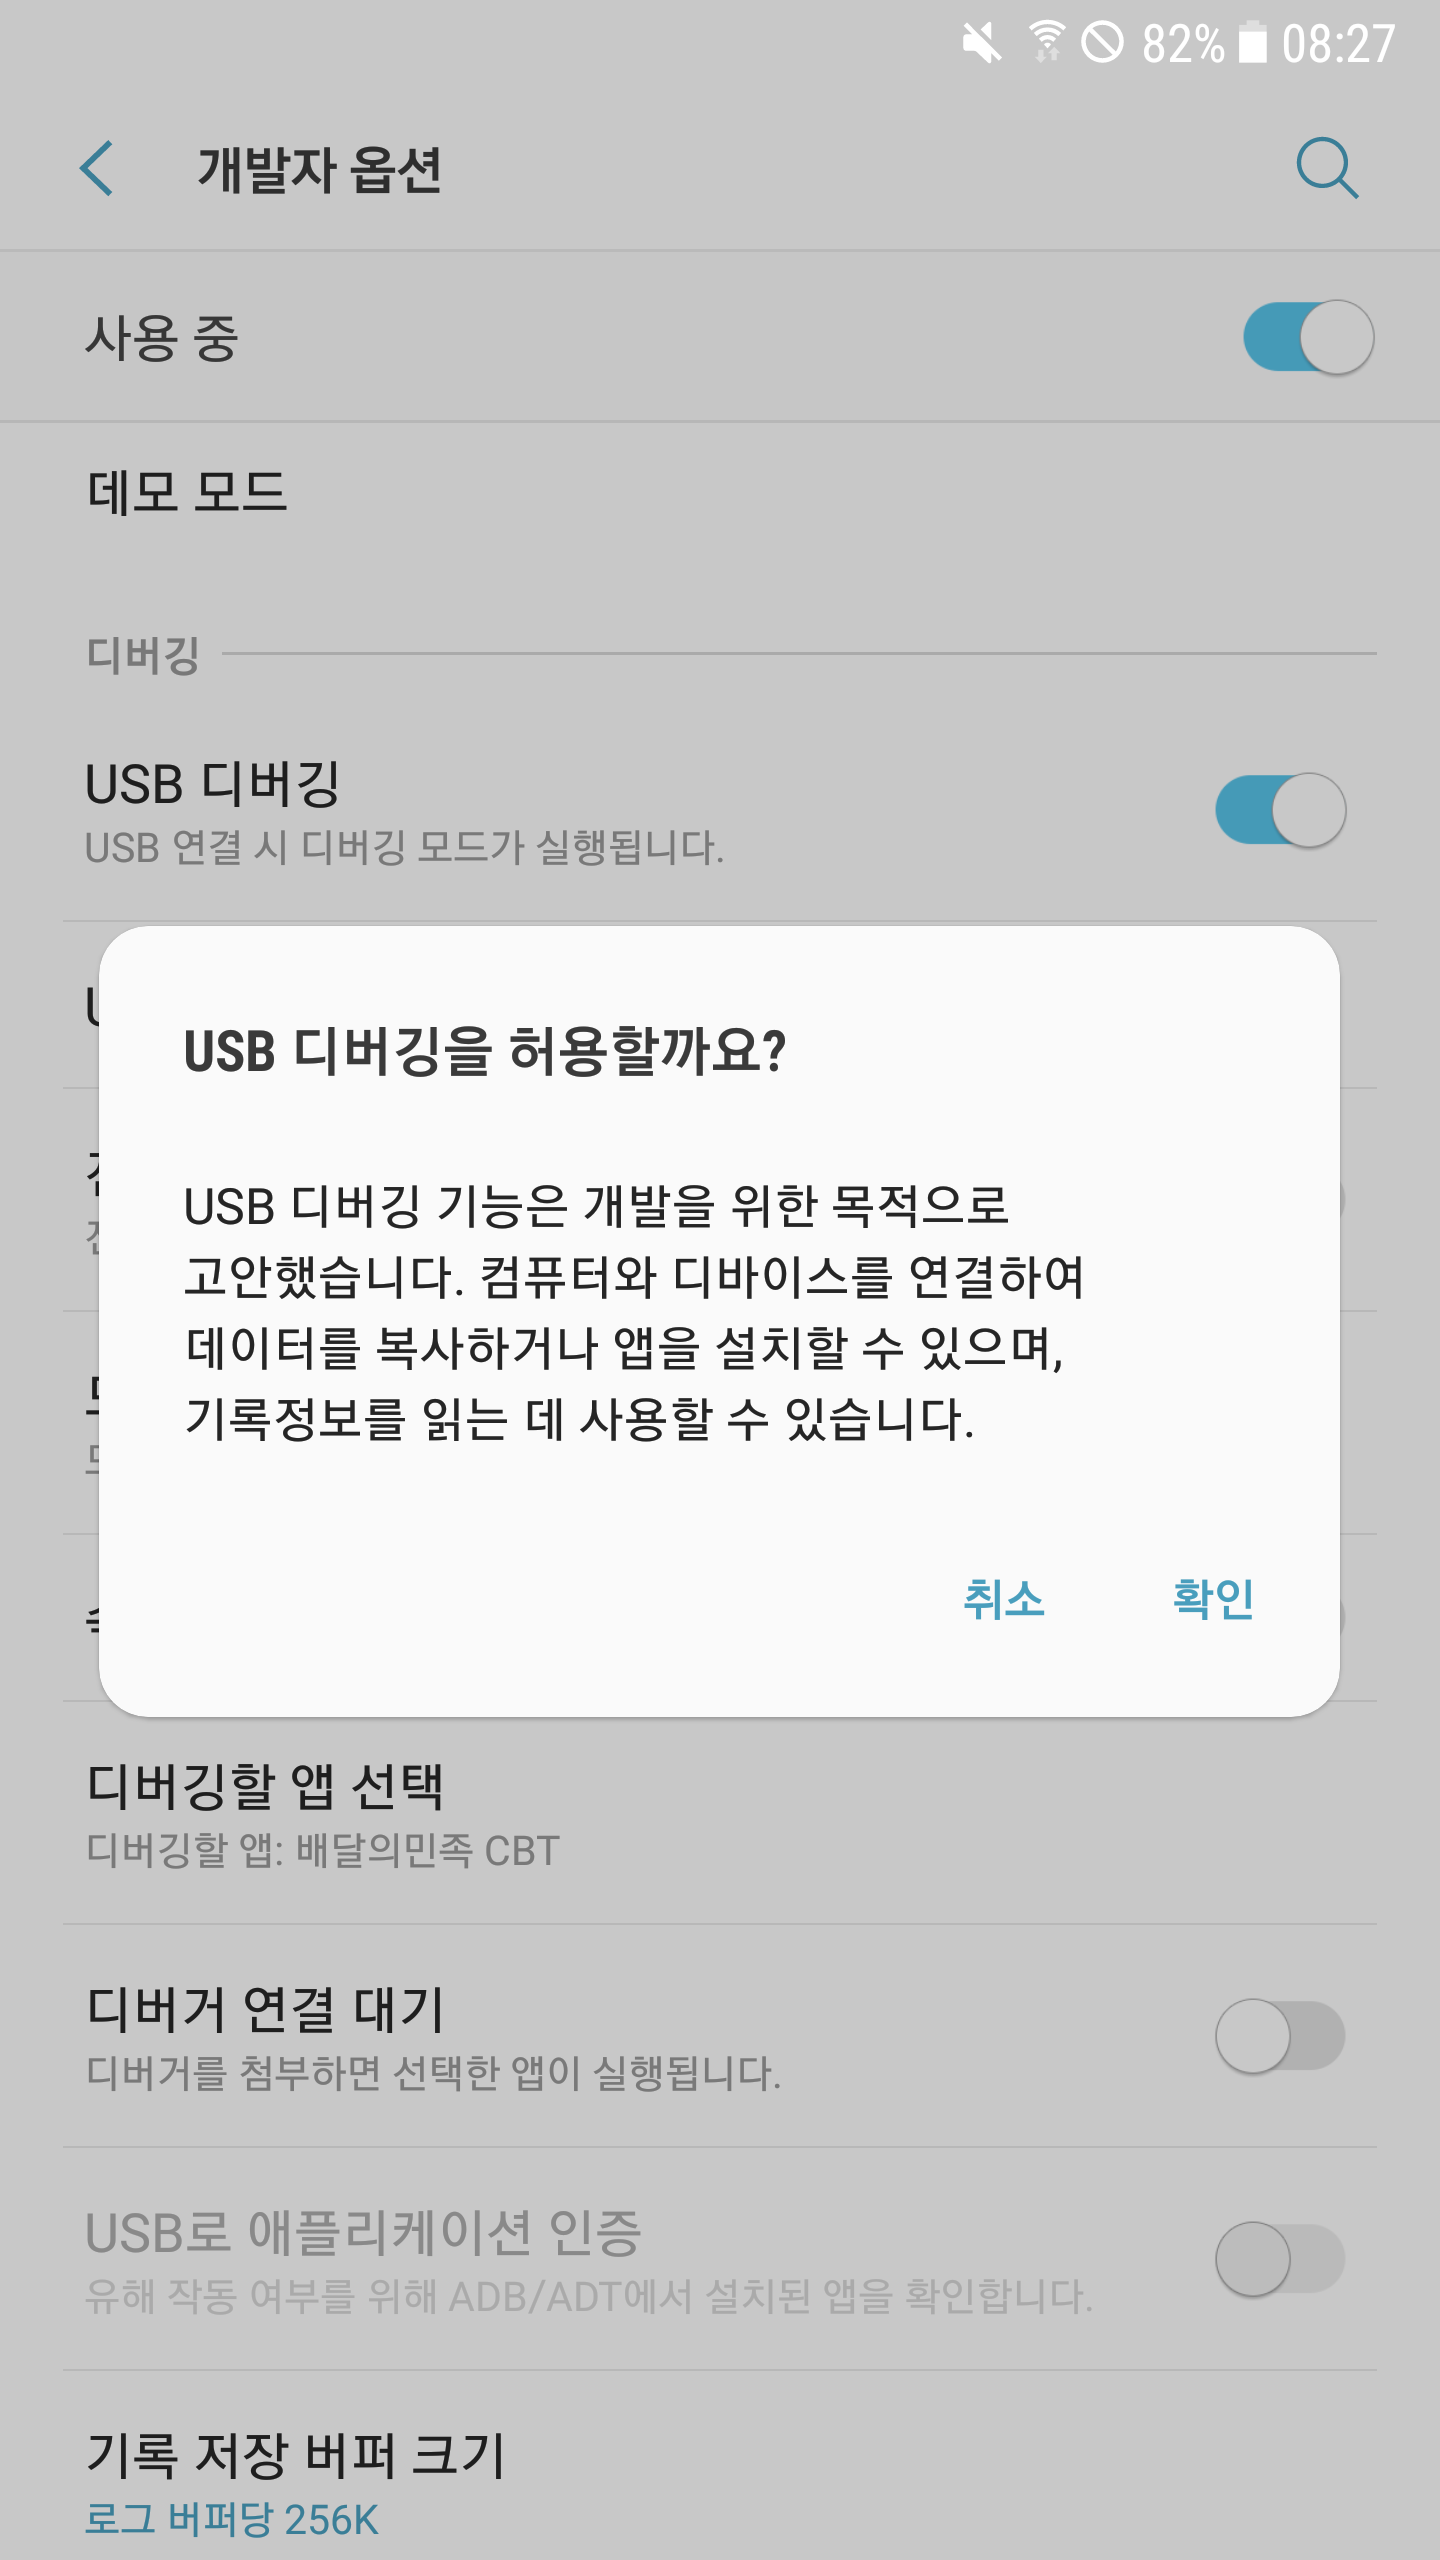
USB 디버깅 활성화
USB 디버깅활성화 안내 창이 뜨면 ‘확인’을 터치합니다.
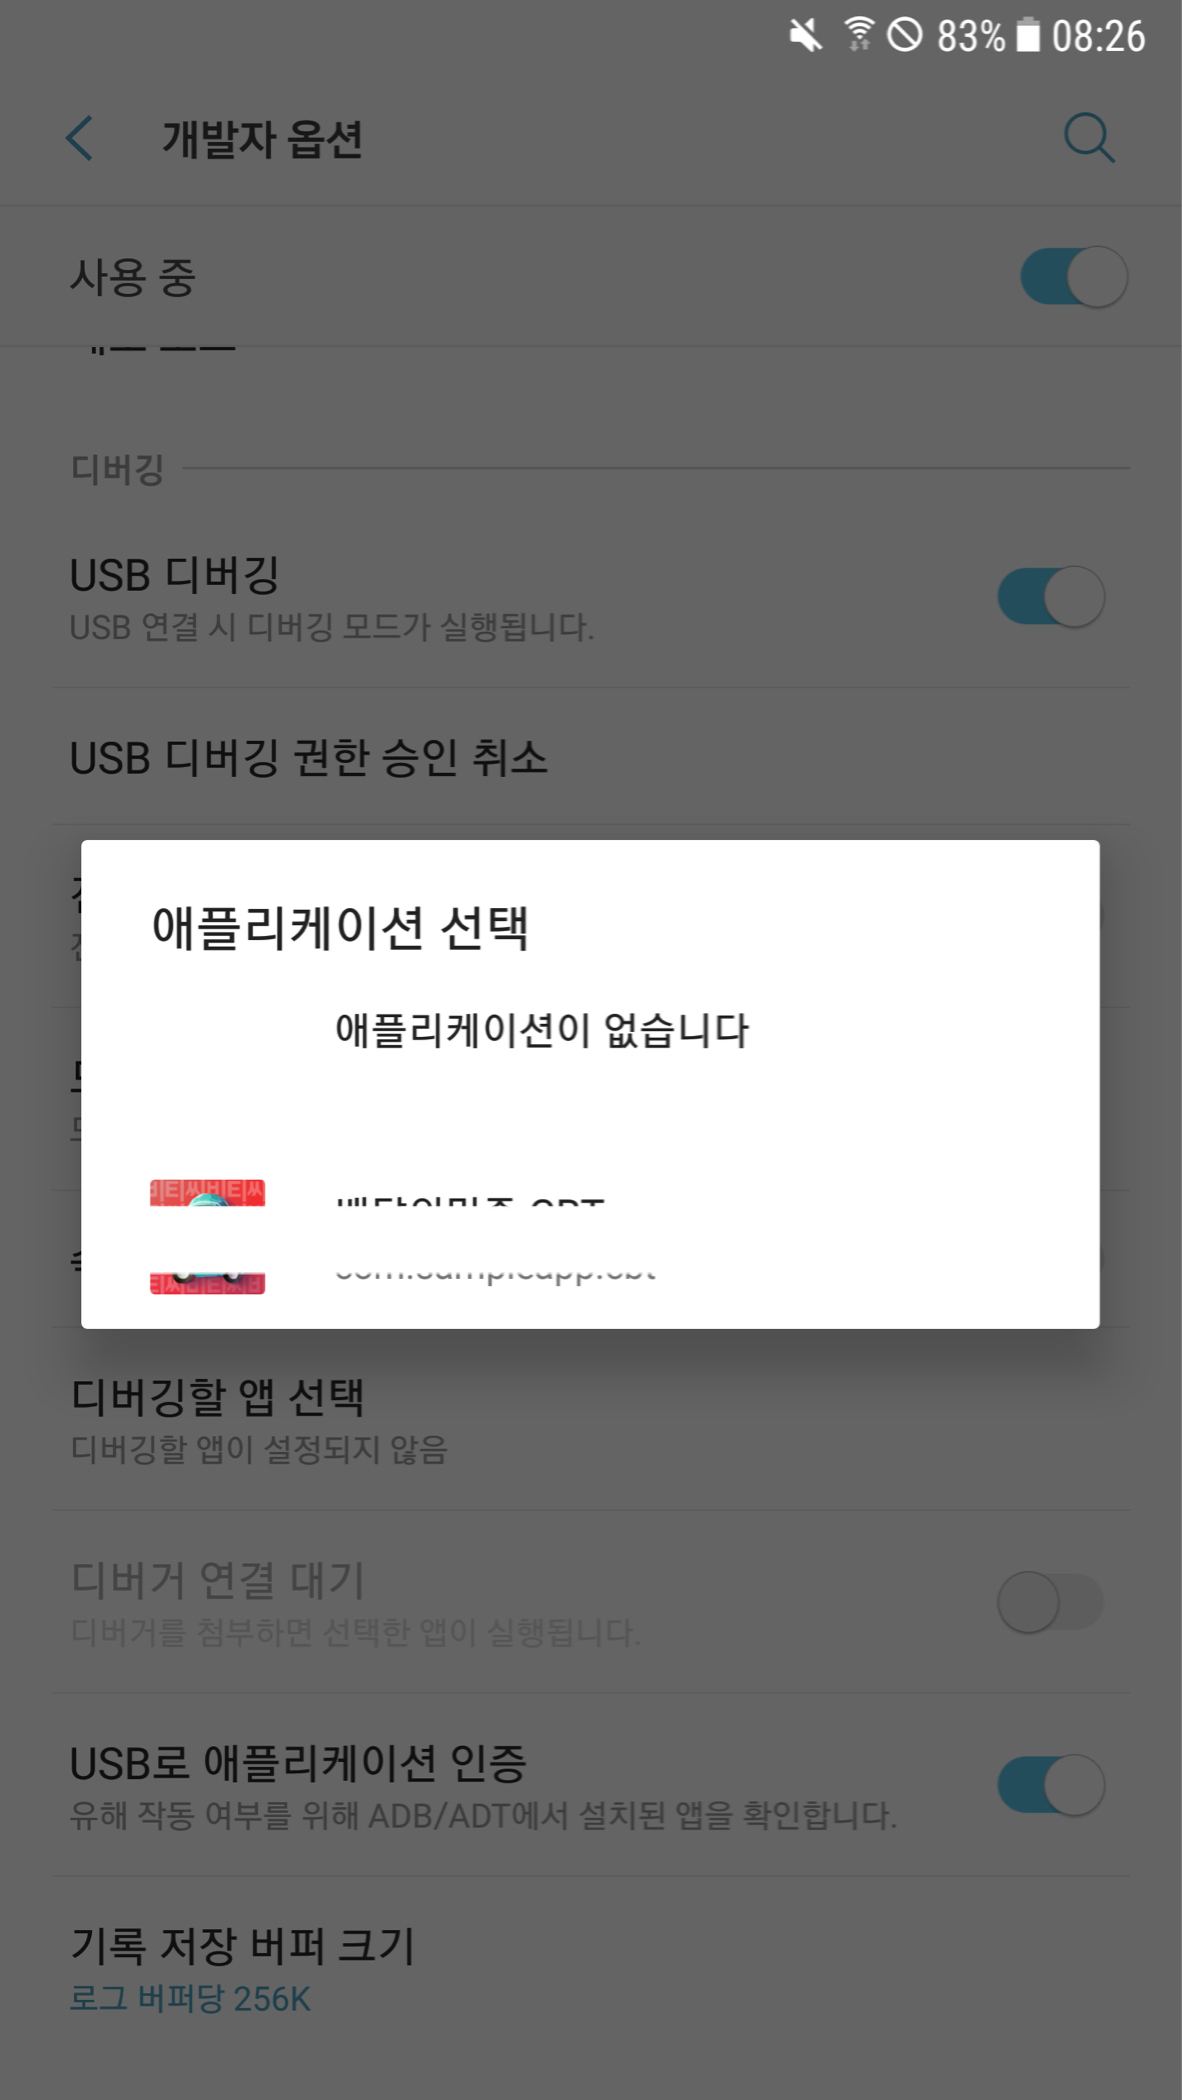
디버깅할 앱 선택
디버깅할 앱 선택메뉴로 디버깅할 앱을 선택 합니다.
Android 장비와 연결
- Android 장비에 데이터 통신이 가능한 케이블을 연결하고
adb가 설치된 macOS와 연결 합니다. - 정상적으로 연결이 되면 아래
USB 디버깅허용을 확인하는 안내 창이 뜹니다.

이 컴퓨터에서 항상 허용체크 후 ‘확인’을 터치합니다.
adb와 연결
$ adb devices

List of devices attached
06157df6f347d70e	device
이렇게 android 장비와 adb 연결을 확인할 수 있습니다.
그럼 이제 adb logcat 명령으로 로그를 확인해보겠습니다.
$ adb logcat
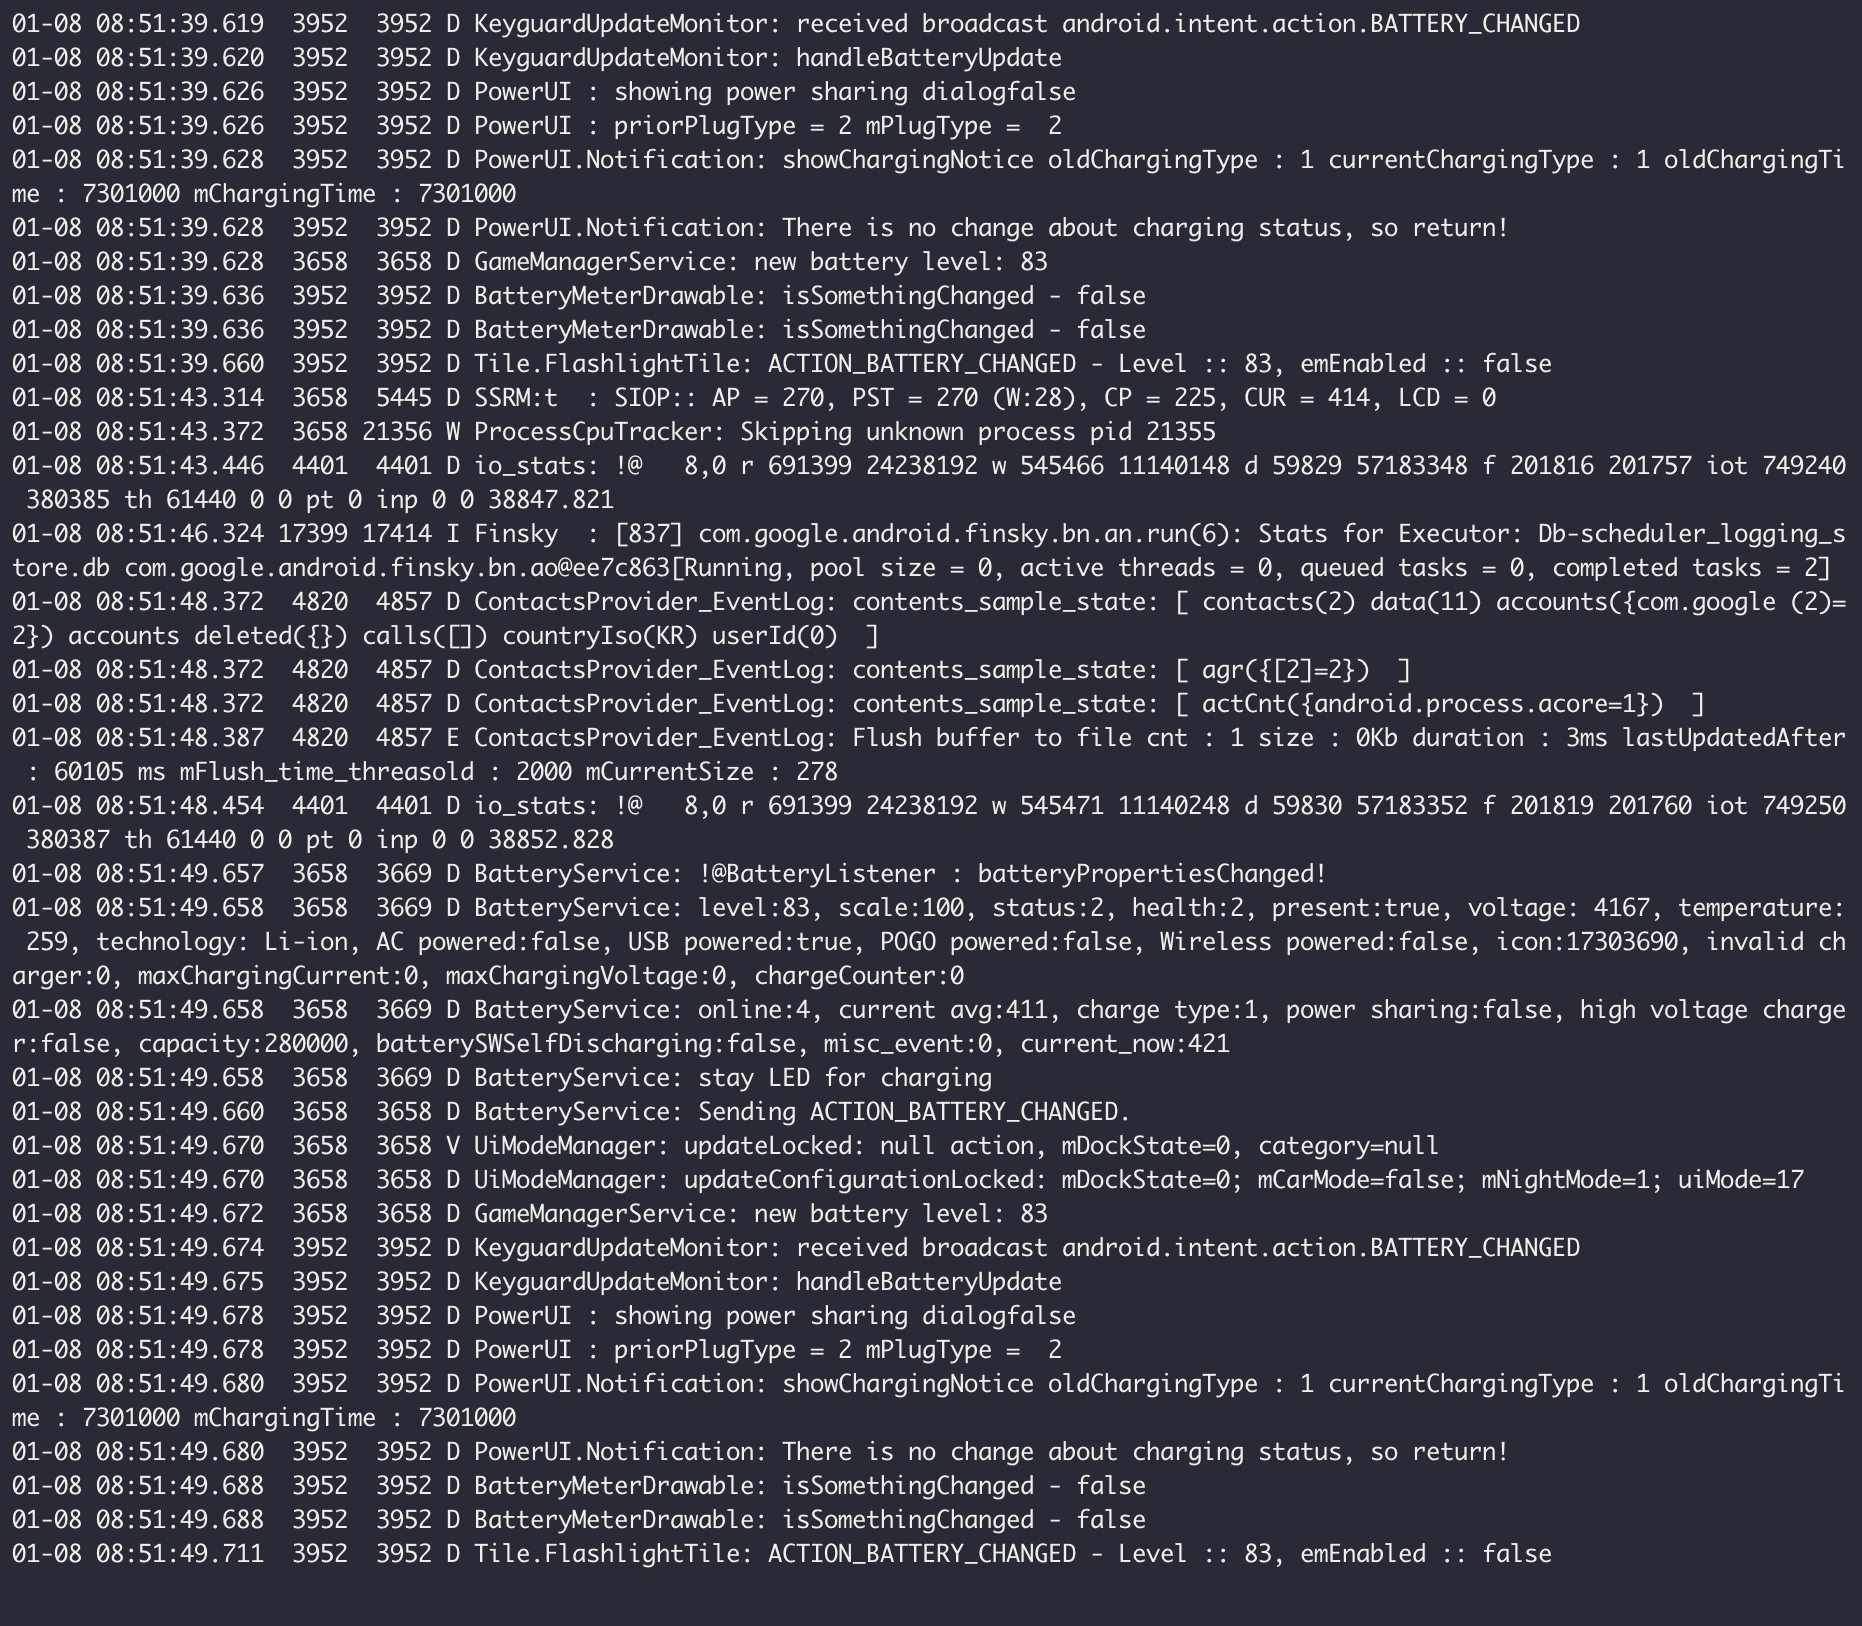 이 방법으로는 확인하고 싶은 로그를 확인하기가 쉽지 않습니다.
PID cat
pidcat은 adb logcat으로 조회할 수 있는 로그들 중 특정 애플리케이션 패키지에 해당하는 로그 항목만 표시하는 도구로 출력되는 로그들을 로그 레벨에 따라 컬러링하여 출력해주는 유용한 도구입니다.
설치
# 설치
$ brew install pidcat

# 설치 확인
$ pidcat -v
pidcat 2.1.0
실행 및 로그 확인
pidcat을 실행합니다.
# pidcat 실행할 때 디버깅할 앱의 패키지를 입력합니다.
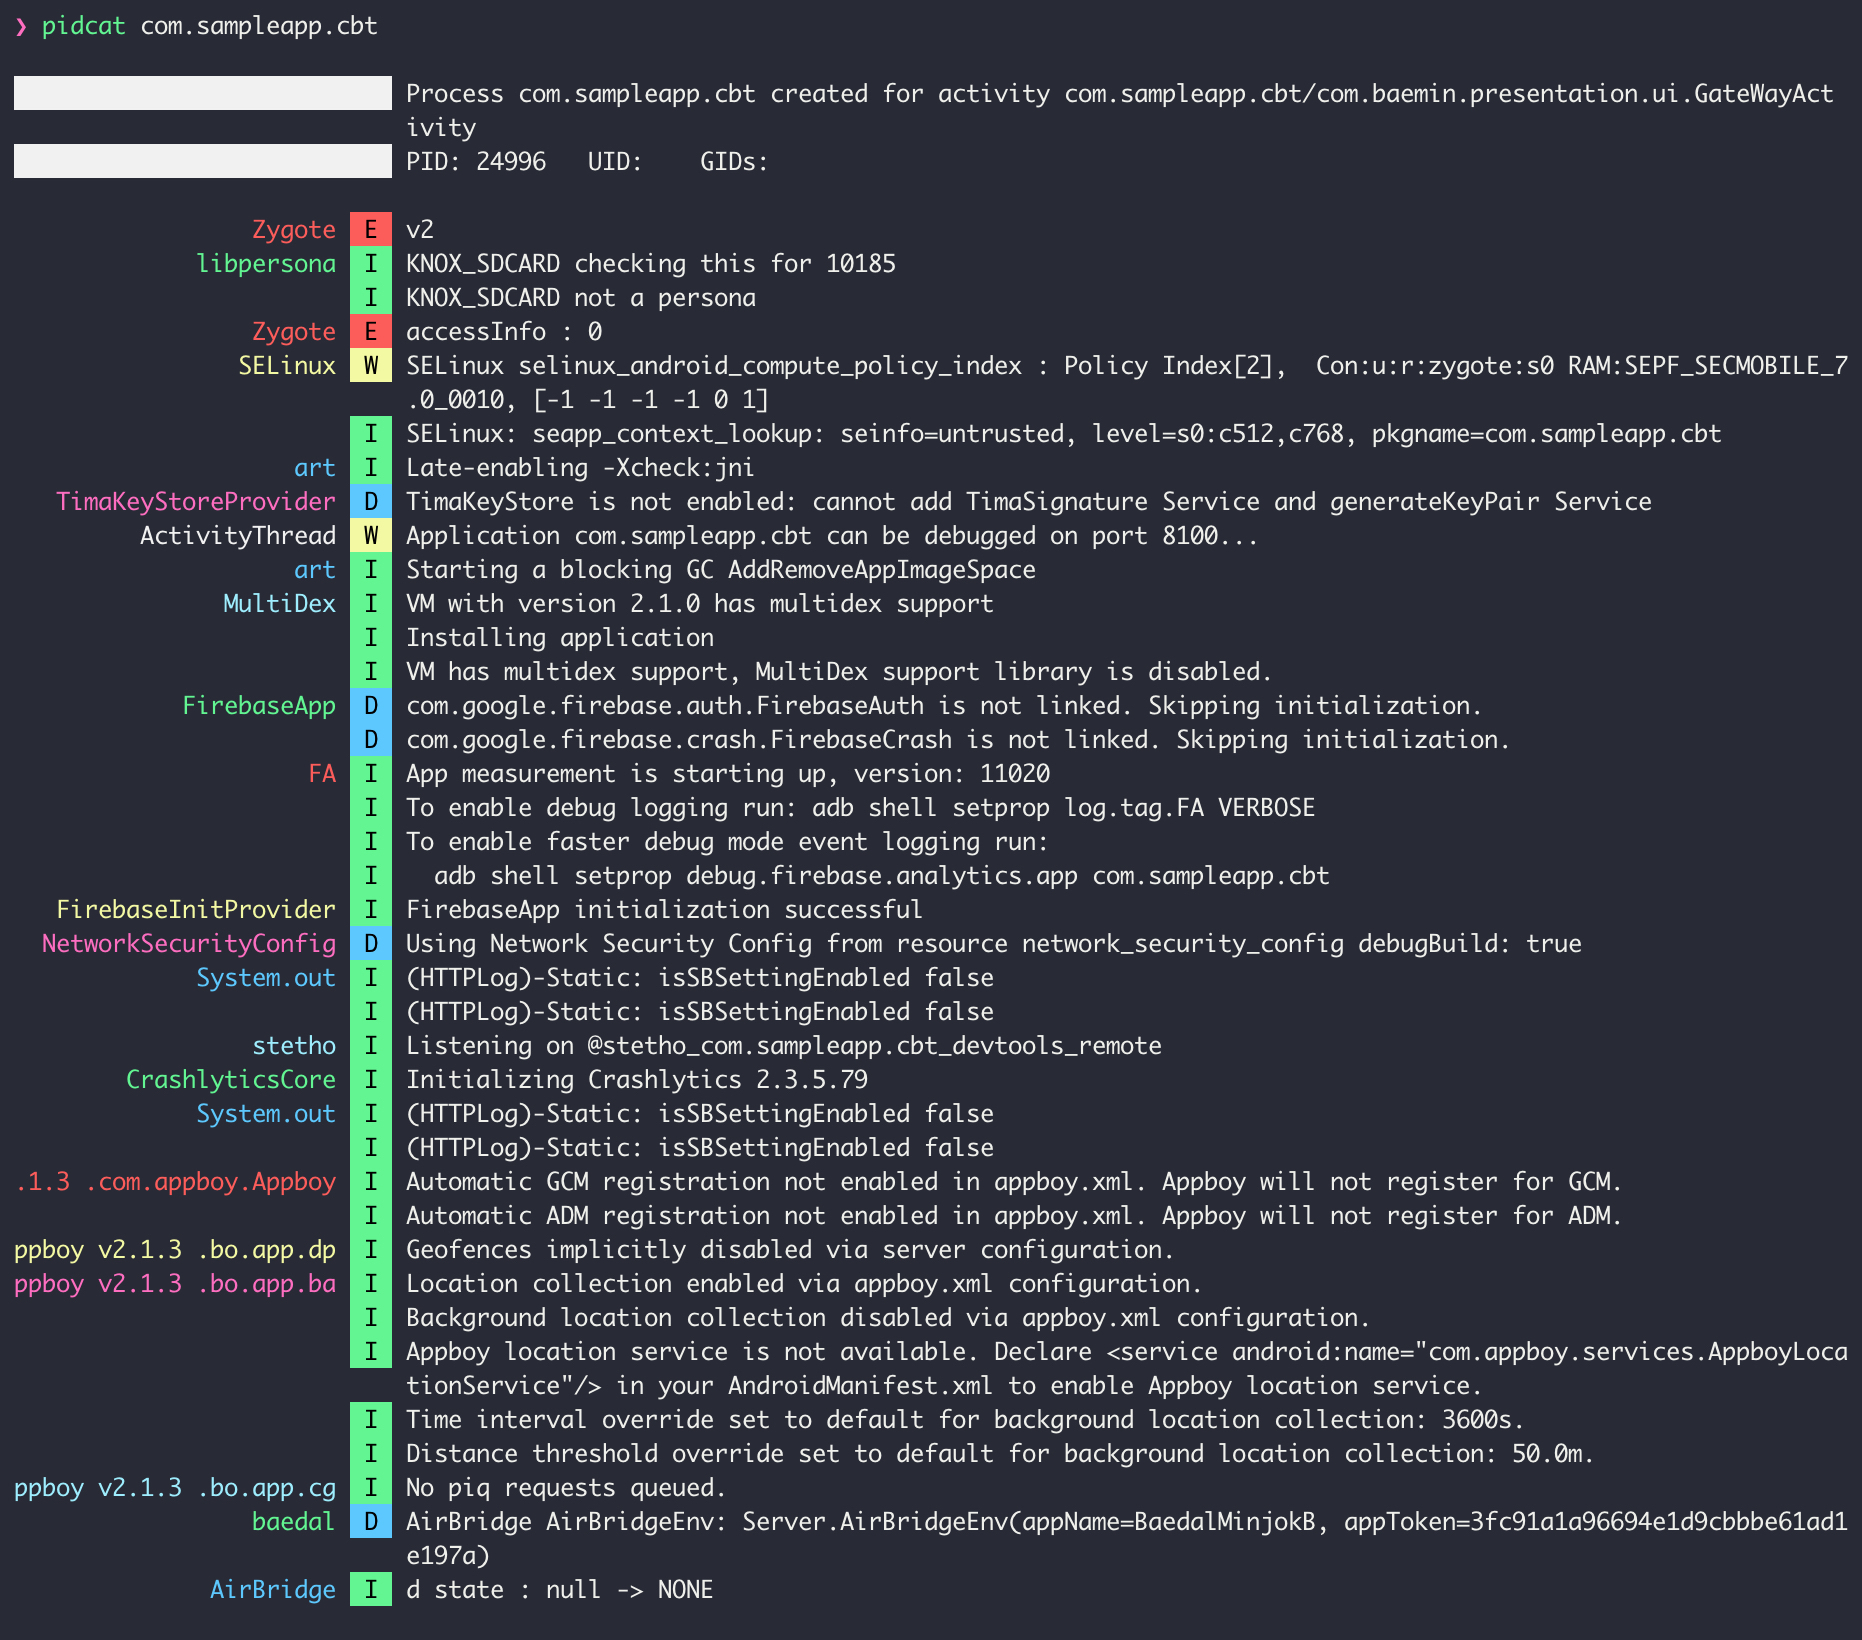
$ pidcat ${디버깅할 패키지 명} #예: com.sampleapp.cbt
adb와 연결된 Android 장비에서 디버깅할 앱을 실행합니다. 그러면, 태그와 로그가 로그 레벨에 따라 출력되는 것을 확인할 수 있습니다.
로그 필터
로그 출력을 다루기 쉬운 레벨로 줄이려면 필터 식을 사용하여 로그 출력을 제한할 수 있습니다. 필터 식을 사용하여 원하는 태그-우선순위 조합을 pidcat에 지시할 수 있으며, pidcat은 지정된 태그에 대해 다른 메시지를 억제합니다.
지정하는 방식은 -t 옵션과 -l 옵션을 지정하여 로그를 필터 할 수 있습니다.
여기서 -t' 옵션은 원하는 태그를 나타내고 -l` 옵션은 해당 태그에 대해 보고할 로그 최소 레벨의 우선순위를 나타냅니다.
- 참고: 로그 우선순위는 다음 문자값 중 하나이며, 가장 낮은 우선순위에서 가장 높은 우선순위로 지정됩니다.
- V — Verbose (가장 낮은 우선순위)
- D — Debug
- I — Info
- W — Warning
- E — Error
- F — Fatal
- S — Silent(가장 높은 순위, 이 경우 아무 것도 출력되지 않음)
# 태그가 AppLog 이고, 로그 레벨 우선순위가 D 인 로그 출력
$ pidcat -t AppLog -l D com.sampleapp.cbt

댓글남기기