ngrok으로 외부에서 로컬 서버 접속 환경 구성
ngrok
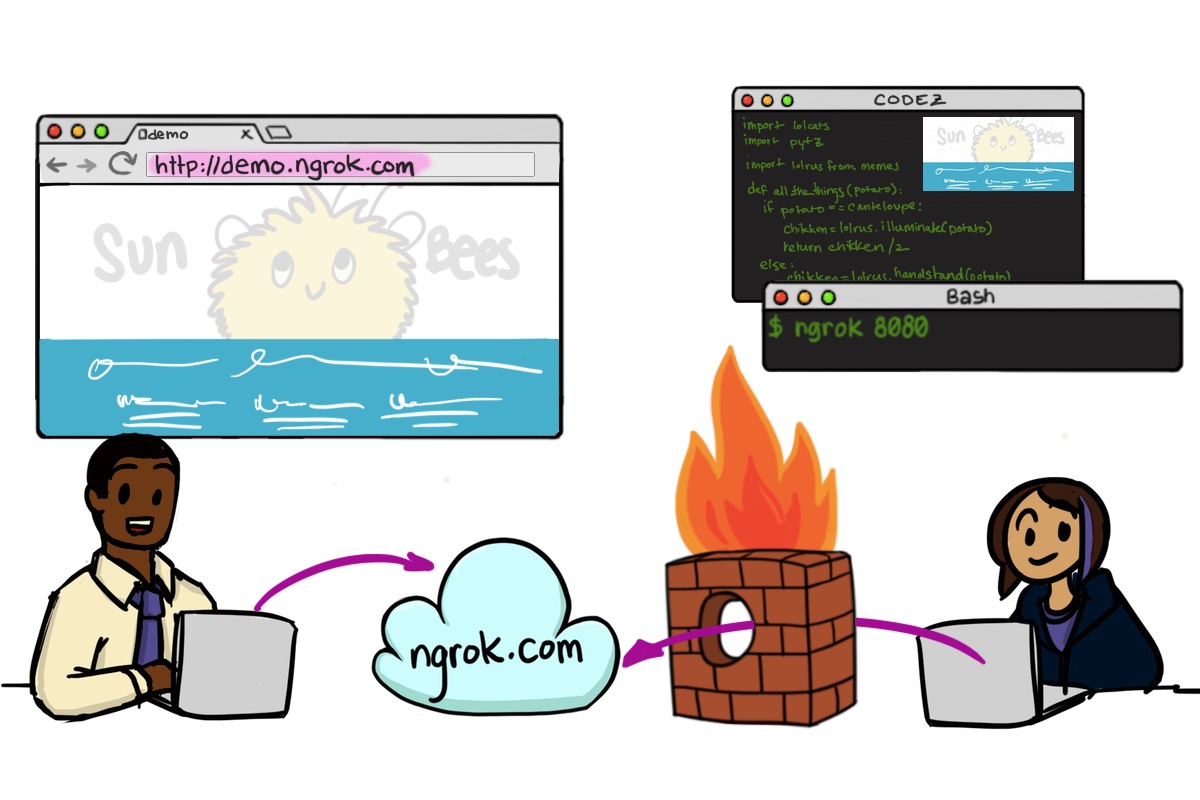
공식 페이지에서 ngrok은 NAT와 방화벽 뒤에 있는 로컬 서버를 안전한 터널을 통해 공개 인터넷에 노출시켜 주는 도구라고 설명되어 있습니다.
즉, 포트 포워딩과 같은 네트워크 환경 설정 변경없이 로컬에 실행중인 서버를 안전하게 외부에서 접근 가능하도록 해주는 도구입니다.
설치
홈페이지에서 설치 파일을 다운로드 받아서 설치할 수 있지만, 저는
brew이용해서 설치를 진행했습니다.
$ brew cask install ngrok
==> Satisfying dependencies
==> Downloading https://bin.equinox.io/c/4VmDzA7iaHb/ngrok-stable-darwin-amd64.zip
######################################################################## 100.0%
==> No SHA-256 checksum defined for Cask 'ngrok', skipping verification.
==> Installing Cask ngrok
==> Linking Binary 'ngrok' to '/usr/local/bin/ngrok'.
🍺  ngrok was successfully installed!
설치가 완료됐고, 설치 확인 명령을 실행해 보도록 하겠습니다.
$ ngrok --help

NAME:
   ngrok - tunnel local ports to public URLs and inspect traffic

DESCRIPTION:
    ngrok exposes local networked services behinds NATs and firewalls to the
    public internet over a secure tunnel. Share local websites, build/test
    webhook consumers and self-host personal services.
    Detailed help for each command is available with 'ngrok help <command>'.
    Open http://localhost:4040 for ngrok's web interface to inspect traffic.

EXAMPLES:
    ngrok http 80                    # secure public URL for port 80 web server
    ngrok http -subdomain=baz 8080   # port 8080 available at baz.ngrok.io
    ngrok http foo.dev:80            # tunnel to host:port instead of localhost
    ngrok tcp 22                     # tunnel arbitrary TCP traffic to port 22
    ngrok tls -hostname=foo.com 443  # TLS traffic for foo.com to port 443
    ngrok start foo bar baz          # start tunnels from the configuration file

VERSION:
   2.2.8

AUTHOR:
  inconshreveable - <alan@ngrok.com>

COMMANDS:
   authtoken	save authtoken to configuration file
   credits	prints author and licensing information
   http		start an HTTP tunnel
   start	start tunnels by name from the configuration file
   tcp		start a TCP tunnel
   tls		start a TLS tunnel
   update	update ngrok to the latest version
   version	print the version string
   help		Shows a list of commands or help for one command
ngrok 사용 방법
ngrok 사용 방법은 매우 간단합니다.
로컬 서버 포트가 8080이라고 가정하면 아래 명령을 실행하면 외부에서 접근 가능합니다.
$ ngrok http 8080

ngrok by @inconshreveable
                        (Ctrl+C to quit)

  Session Status                online
  Session Expires               7 hours, 59 minutes
  Version                       2.2.8
  Region                        United States (us)
  Web Interface                 http://127.0.0.1:4040
  Forwarding                    http://7e78ace7.ngrok.io -> localhost:8080
  Forwarding                    https://7e78ace7.ngrok.io -> localhost:8080

  Connections                   ttl     opn     rt1     rt5     p50     p90
                                0       0       0.00    0.00    0.00    0.00
외부 네트워크 환경에서 브라우저를 열고 http://7e78ace7.ngrok.io 입력하면 로컬에 실행 중인 서버 8080 포트로 접속하여 확인할 수 있습니다.
무료 사용의 경우
ngrok명령 실행 종료 후 재 실행 시 접속 URL이 변경되는 문제가 있지만, 테스트 용으로 사용하기엔 무료 사용도 충분한 것 같습니다.
Session Expire 해결
ngrok은 기본 Session 유지 시간이 8시간 입니다.
8시간이 지난 후엔 다시 ngrok을 실행해야 하며 이때 URL이 변경되는 문제가 있습니다.
이렇게 세션을 8시간 이상 유지가 필요한 경우 우선 https://dashboard.ngrok.com/user/signup 가입을 진행합니다.
google이나 github 계정으로 쉽게 가입 후 로그인 가능합니다.
로그인 후에 Auth Token 을 복사합니다.
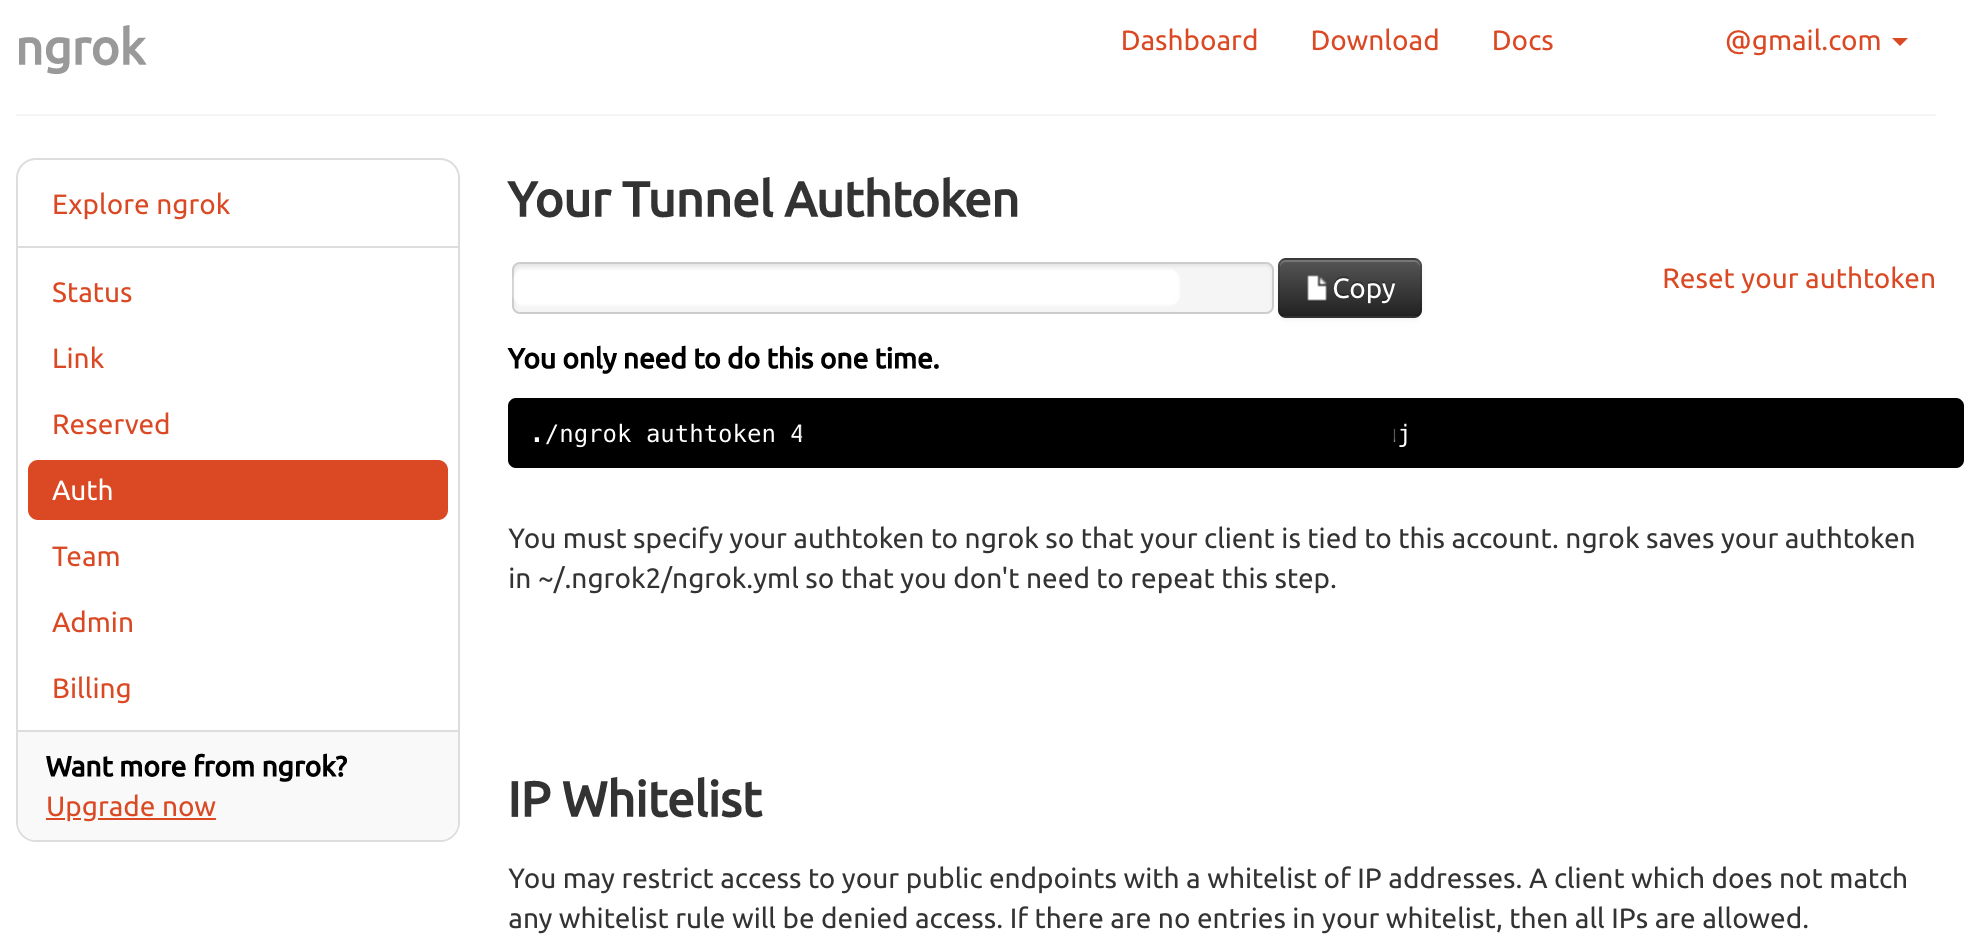
ngrok 명령을 재실행 합니다.
$ ngrok http 80 --authtoken={Auth-Token}

ngrok by @inconshreveable                                                                                                                                                                                                   (Ctrl+C to quit)

Session Status                online
Account                       홍 길 동  (Plan: Free)
Version                       2.2.8
Region                        United States (us)
Web Interface                 http://127.0.0.1:4040
Forwarding                    http://9eb169c6.ngrok.io -> localhost:80
Forwarding                    https://9eb169c6.ngrok.io -> localhost:80
위와 같이 Session Expires 항목이 더 이상 노출되지 않는 것을 확인할 수 있습니다.
어떤 경우에 사용하나?
저의 경우에는 테스트 환경을 구성하다보면 외부에서 접근 가능한 서버(Mock, Proxy)를 올리기 위해서 AWS 같은 곳에 환경을 구성하기엔 너무 일이 커집니다. (사실 귀찮은게 더 큰 이유입니다. 쿨럭;;)
이럴때, ngrok은 로컬 테스트 환경에서 외부에서 접속 가능하도록 해주기 때문에 편하게 원하는 환경을 구성해서 사용할 수 있습니다.
댓글남기기